Free workshop guide · Updated October 2026
Small Woodworking Projects: 8 Useful Ideas and a Free Step-by-Step Build
You do not need to buy a plan collection to make something useful. This guide helps you choose a manageable project, estimate materials, and build a simple wooden desk tray with a complete cut list and assembly sequence.
1. Choose a project you will actually use
A project is beginner-friendly when its dimensions, tools, joinery and safety requirements match your experience. Small size alone does not make a project easy.
| Project | What you learn | Typical challenge | Starting point |
|---|---|---|---|
| Desk tray | Square layout, glue-up, sanding | Keeping the rim aligned | Complete free plan below |
| Bookends | Repeatable cuts, assembly | Preventing tipping | Beginner with a suitable plan |
| Drawer divider | Measuring to fit | Allowance for drawer clearance | Beginner |
| Simple desk organizer | Compartment layout | Keeping dividers square | Beginner/intermediate |
| Phone stand | Angle layout | Precise slots | Depends on tools |
| Wooden plant coaster | Moisture protection | Finish durability | Beginner |
| Wall key holder | Layout and hardware | Correct wall anchors | After basic fastening practice |
| Small plant stand | Joinery and stability | Load capacity and tipping | Intermediate; use an engineered plan |
2. Free project: a wooden desk tray
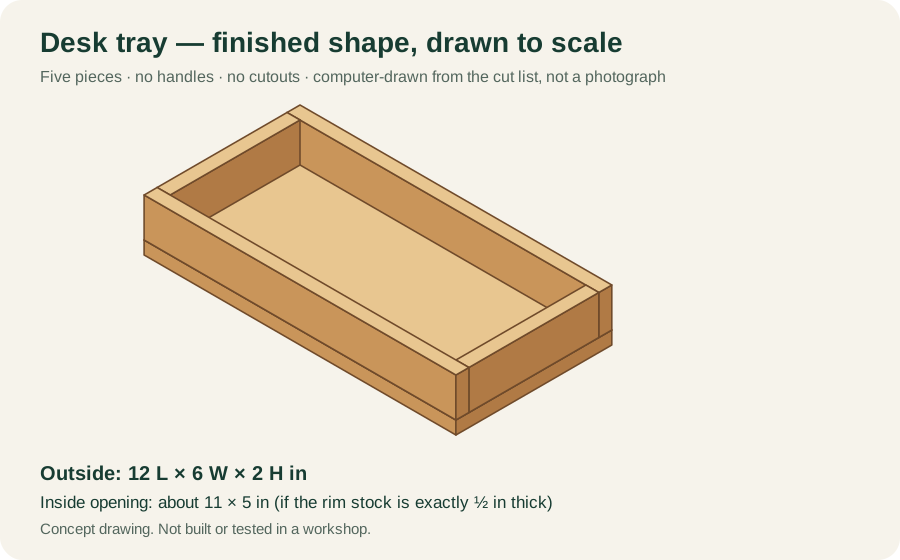
Finished outside dimensions: approximately 12 in long × 6 in wide × 2 in tall (305 × 152 × 51 mm). This is a shallow tray for pens, keys and other light desk items—not for food, carrying hot items or supporting heavy loads.
Skill level: beginner. Hands-on work: not measured, because this design has not been built; allow time for dry-fitting, plus glue curing and finish drying according to product instructions. Joinery: butt joints secured with wood glue; the tray is not designed for lifting by the rim.
Cut list and build sequence at a glance
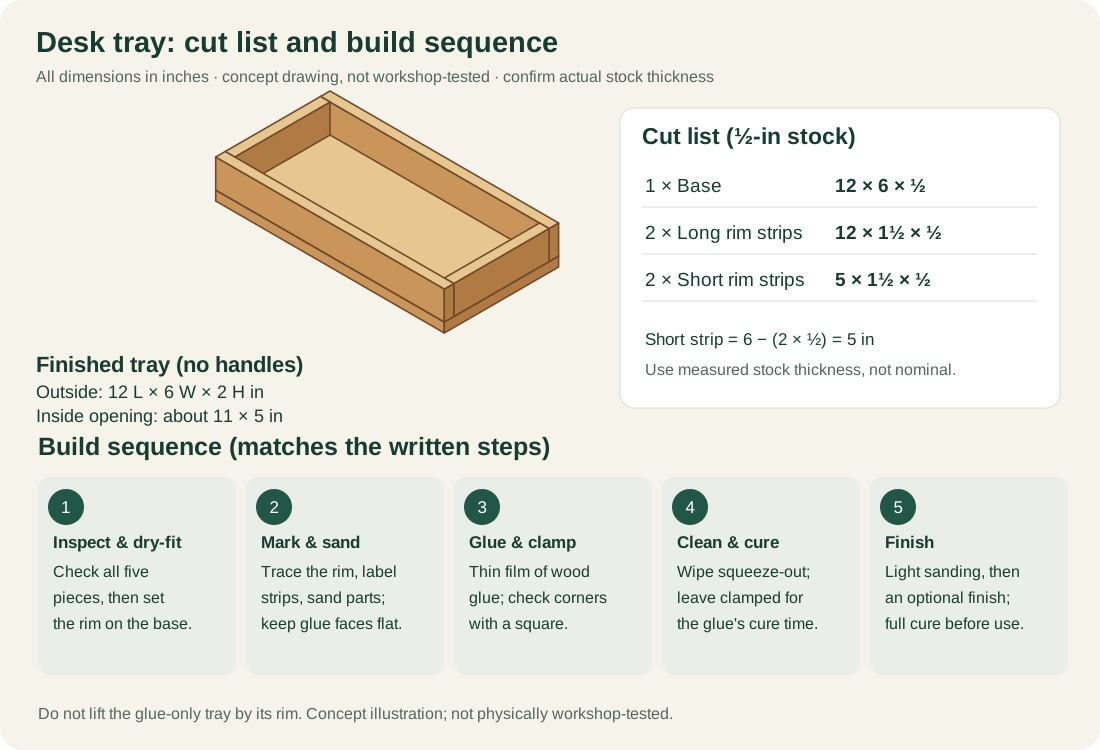
The overview below uses the same five-piece cut list and dimensions as the instructions, and its five stages follow the written steps. It is an explanatory drawing, not a workshop-tested build.
Materials and cut list
| Part | Quantity | Cut dimensions (L × W × thickness) | Purpose |
|---|---|---|---|
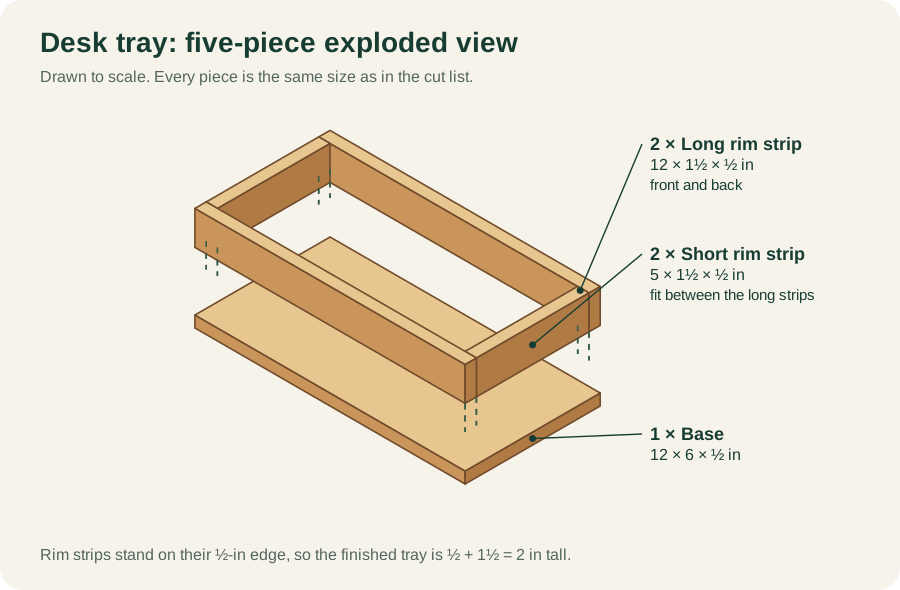
| Base | 1 | 12 × 6 × ½ in | Tray bottom |
| Long rim strips | 2 | 12 × 1½ × ½ in | Front and back |
| Short rim strips | 2 | 5 × 1½ × ½ in | Fit between long strips |
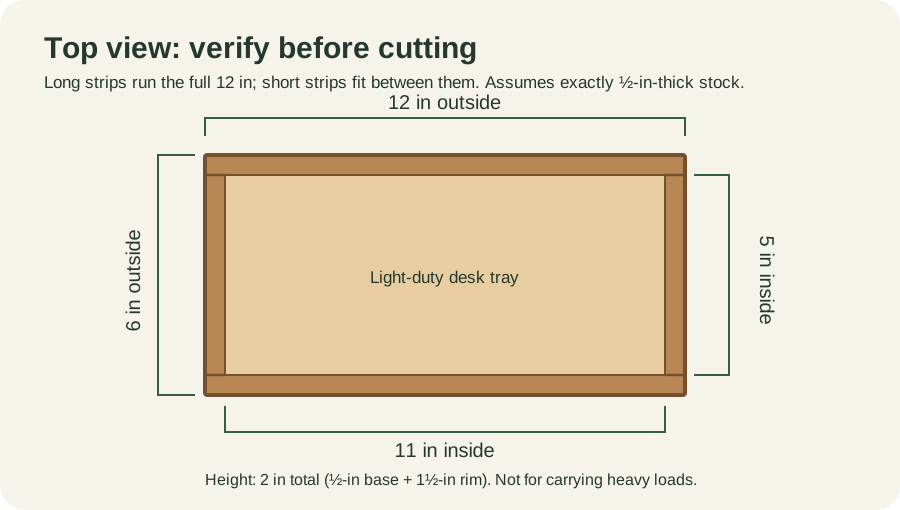
All dimensions are nominal design dimensions in inches; ½ in ≈ 12.7 mm. The 5-inch end strips assume the long strips are exactly ½ inch thick: 6 − ½ − ½ = 5 inches. Measure your actual stock and adjust before cutting. The assembled outside height is ½ + 1½ = 2 inches.
Other supplies: wood glue rated for interior woodworking, two or more suitable clamps, measuring tape or ruler, square, pencil, 120- and 180-grit sandpaper, protective work surface, clean cloth, and an optional finish compatible with the wood and intended use. Ask the supplier for pre-cut pieces if needed. Avoid pressure-treated wood for this indoor desktop project.
Step-by-step assembly
- Inspect the pieces. Check for splinters, cracks and excessive warping. Reject damaged stock. Confirm the two long strips match and that each short strip fits snugly between them.
- Dry-fit the rim. Place the long strips along the two 12-inch edges of the base, with their ½-inch-thick edge resting on the base. Fit the short strips between them at each end. The outside perimeter should line up with the base.
- Mark positions. Trace the rim lightly on the base and label the underside of each strip. This makes it easier to return the pieces to the correct location during glue-up.
- Sand before assembly. Lightly smooth exposed faces and sharp edges with 120-grit, then 180-grit abrasive. Keep mating glue surfaces flat and free of dust; do not round over the contact edges.
- Apply glue. Spread a thin, even film of wood glue on the bottom edge of each rim strip and on the short-to-long strip end joints. Follow the adhesive manufacturer's application and open-time directions.
- Assemble and clamp. Set the strips on the base using the marked positions. Check the corners with a square. Apply gentle, even clamping pressure; avoid bowing the strips or squeezing out all adhesive.
- Clean and cure. Remove accessible squeeze-out according to the glue label. Leave the assembly clamped for the specified time, and do not load or finish the tray until the adhesive has cured as directed.
- Finish safely. Lightly sand any rough areas, remove dust and apply an optional finish following its ventilation, protective-equipment and drying instructions. Allow full cure before use.
How to check the result
Set the tray on a flat desk: it should sit without rocking. Check for visible gaps, sharp edges and loose joints. The interior should measure about 11 × 5 inches if all parts are accurately cut. Do not use the tray if the glue joints separate or the wood cracks.
3. Estimate your actual cost
Prices vary by location and wood species, so this is a worksheet, not a current market quote. Record the amount you will actually pay, including the cost of full boards if offcuts cannot be purchased separately.
| Expense | Example only | Your price |
|---|---|---|
| Wood / pre-cut pieces | $14 | _____ |
| Glue allocated to project | $3 | _____ |
| Abrasives | $3 | _____ |
| Optional finish | $7 | _____ |
| Allowance for waste | $3 | _____ |
| Total example | $30 | _____ |
Tools, shipping, taxes and cutting-service fees are not included in the example. If you already have offcuts and supplies, your incremental cost may be lower.
4. Four common problems and how to prevent them
The end pieces do not fit
Check the actual thickness of the long strips. The end-strip length equals the base width minus twice that thickness. Dry-fit and measure before applying glue.
The rim shifts during clamping
Apply pressure gradually and alternate between clamps. Check alignment and squareness before the glue sets. Do not rely on clamps to force severely warped stock straight.
The finished tray rocks
Check whether the base was flat before assembly and whether glue squeeze-out or debris is trapped underneath. Do not attempt to fix a cracked or structurally unsound piece by sanding away large amounts of material.
The finish looks blotchy
Test the finish on a scrap of the same wood, sand evenly, remove dust and follow the product's preparation and application instructions.
5. What should you build next?
After finishing the desk tray, a drawer divider is a logical next step: it uses the same measuring and fitting skills, but requires accounting for the exact inside dimensions of your drawer. Bookends are another option for practicing repeatable cuts and stability.
For other free instructions, browse Instructables, Kreg, and Ana White. Review each project's tools, dimensions and safety guidance rather than assuming every published plan is complete.
If you're learning the basics, read our beginner woodworking guide. When comparing downloaded plans or commercial bundles, use our woodworking plans buying checklist. You can complete this tray without purchasing a plan collection.
6. Frequently asked questions
Can I make the tray without owning a saw?
Yes, if a lumber supplier or local workshop can cut the pieces accurately. You will still need to check the dimensions, sand the parts and assemble them safely.
Can I use plywood?
Yes, suitable ½-inch plywood can work. Check actual thickness, edge quality and suitability for an indoor project; plywood edges may require extra finishing.
Can I resize the tray?
Yes. For this design, the long strips match the base length, and each short strip equals the base width minus twice the long-strip thickness. Larger or heavier-duty versions may require different joinery and additional design checks.
Can I sell trays made from this example?
This original instructional example is provided for personal learning; you may use the dimensions to make your own tray. Before selling physical products, consider product safety, material suitability, local requirements, actual costs and customer demand. No earnings are promised.
Do I need TedsWoodworking for these projects?
No. This page includes a complete free introductory project and links to other educational resources. Paid collections are optional; compare any offer against your actual needs.
Editorial note: This is an original illustrative build guide, not a workshop-tested engineering drawing. Verify all dimensions against your materials before cutting.